
certbot-auto申请证书时发现如下提示;certbot-auto被弃用了
Skipping bootstrap because certbot-auto is deprecated on this system.
Your system is not supported by certbot-auto anymore.
Certbot cannot be installed.
Please visit https://certbot.eff.org/ to check for other alternatives.
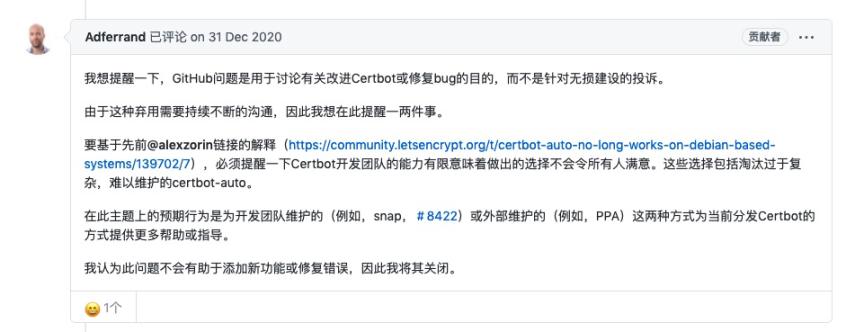
根据github的issue看到作者的回应(原回复是英文, 我机翻了一下截图出来)
github的issue: https://github.com/certbot/certbot/issues/8535
centos7下的安装如下:
# 将EPEL添加到CentOS 7
yum install epel-release
#安装snapd
yum install snapd
#安装后,需要启用用于管理主快照通信套接字
systemctl enable --now snapd.socket
# 启用快照支持
ln -s /var/lib/snapd/snap /snap
检查更新snap版本
 snap install core
 snap refresh core
# 以前没有装过的不用这一步
yum remove certbot
# 安装certbot
snap install --classic certbot
# --classic: 官方对classic是如上面所描述的那样定义的,它是与strict相对的。也就是说,在默认情况下,它使用的是strict模式,对安全权限做了极高的要求与限制,然后classic就和传统的安装包一样对安全权限没有限制,其实这里的classic就约等于确认已知不安全的风险的含义

# 添加软链,全局使用
ln -s /snap/bin/certbot /usr/bin/certbot
不管是申请还是续期,只要是通配符证书,只能采用 dns-01 的方式校验申请者的域名,也就是说 certbot 操作者必须手动添加 DNS TXT 记录。
如果你编写一个 Cron (比如 1 1 */1 * * root certbot-auto renew),自动 renew 通配符证书,此时 Cron 无法自动添加 TXT 记录,这样 renew 操作就会失败,如何 解决?
certbot 提供了一个 hook,可以编写一个 Shell 脚本,让脚本调用 DNS 服务商的 API 接口,动态添加 TXT 记录,这样就无需人工干预了。
这里就要用到第三方插件: https://github.com/ywdblog/certbot-letencrypt-wildcardcertificates-alydns-au, 目前支持阿里云 DNS、腾讯云 DNS、华为云 NDS、GoDaddy;
下载:
git clone https://github.com/ywdblog/certbot-letencrypt-wildcardcertificates-alydns-au

cd certbot-letencrypt-wildcardcertificates-alydns-au

chmod 0777 au.sh
# 例子(这些参数根据自己的情况填写)
certbot certonly
-d example.com
-d *.example.com
--manual
--preferred-challenges dns
--dry-run
--manual-auth-hook "/etc/certbot-letencrypt-wildcardcertificates-alydns-au/au.sh python aly add"        # 申请之前添加TXT记录
--manual-cleanup-hook "/etc/certbot-letencrypt-wildcardcertificates-alydns-au/au.sh python aly clean"       # 申请之后删除TXT记录
--pre-hook "systemctl stop nginx.service"    # 停止nginx
--post-hook "systemctl start nginx.service"  # 启动nginx
详细的参数说明到github查看: https://github.com/ywdblog/certbot-letencrypt-wildcardcertificates-alydns-au
申请成功后:
配置文件: /etc/letsencrypt/renewal/
证书文件源目录: /etc/letsencrypt/archive/
证书文件映射目录: /etc/letsencrypt/live/
知道了这些,我们来实际操作一下:
nginx(openresty)配置文件中添加ssl证书, 这个不用多说了
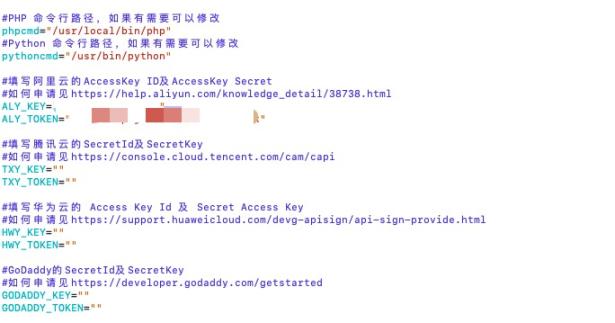
首先去配置一下第三方插件, 检查一下php和python执行程序的路径是否正确, 并填写阿里云或者其他平台的key和token
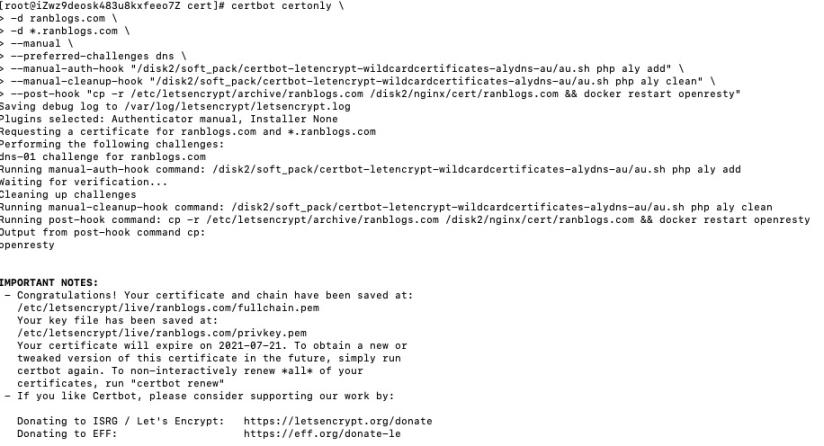
certbot certonly \
-d ranblogs.com \
-d *.ranblogs.com \
--manual \
--preferred-challenges dns \
--manual-auth-hook "/disk2/soft_pack/certbot-letencrypt-wildcardcertificates-alydns-au/au.sh php aly add" \
--manual-cleanup-hook "/disk2/soft_pack/certbot-letencrypt-wildcardcertificates-alydns-au/au.sh php aly clean" \
--post-hook "cp -r /etc/letsencrypt/archive/ranblogs.com /disk2/nginx/cert/ranblogs.com && docker restart openresty"

# post-hook: 我这里是docker环境无法找到外面的文件, 所以我这里是把证书文件放到docker映射的目录去了,并重启openresty
执行结果:
验证结果: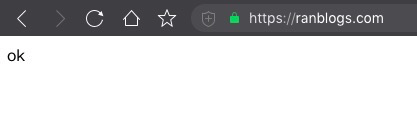
上面已经成功申请到证书了, 但是只有三个月的有效期, 这肯定是不够的, 还好certbot也提供了自动续期的命令certbot renew
现在我们把这个命令加到定时器:
crontab -e
# 定时续期(每天执行)
0 0 1 * * sudo certbot renew --deploy-hook  "cp -r /etc/letsencrypt/archive/ranblogs.com /disk2/nginx/cert/ranblogs.com && docker restart openresty"
这里可能会有点疑问, 假如当天ssl到期了, 但是定时器还没执行, 是不是会有一段时间内https无法使用; 其实certbot已经考虑到了, 会在到期前30天续期;所以不用担心这个问题;
自己修改路径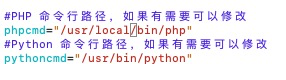
certbot官网: https://certbot.eff.org/
https://blog.csdn.net/baidu_19473529/article/details/114277125
https://github.com/ywdblog/certbot-letencrypt-wildcardcertificates-alydns-au
 AI助手
AI助手 资讯
资讯 常用工具
常用工具 网站模板
网站模板